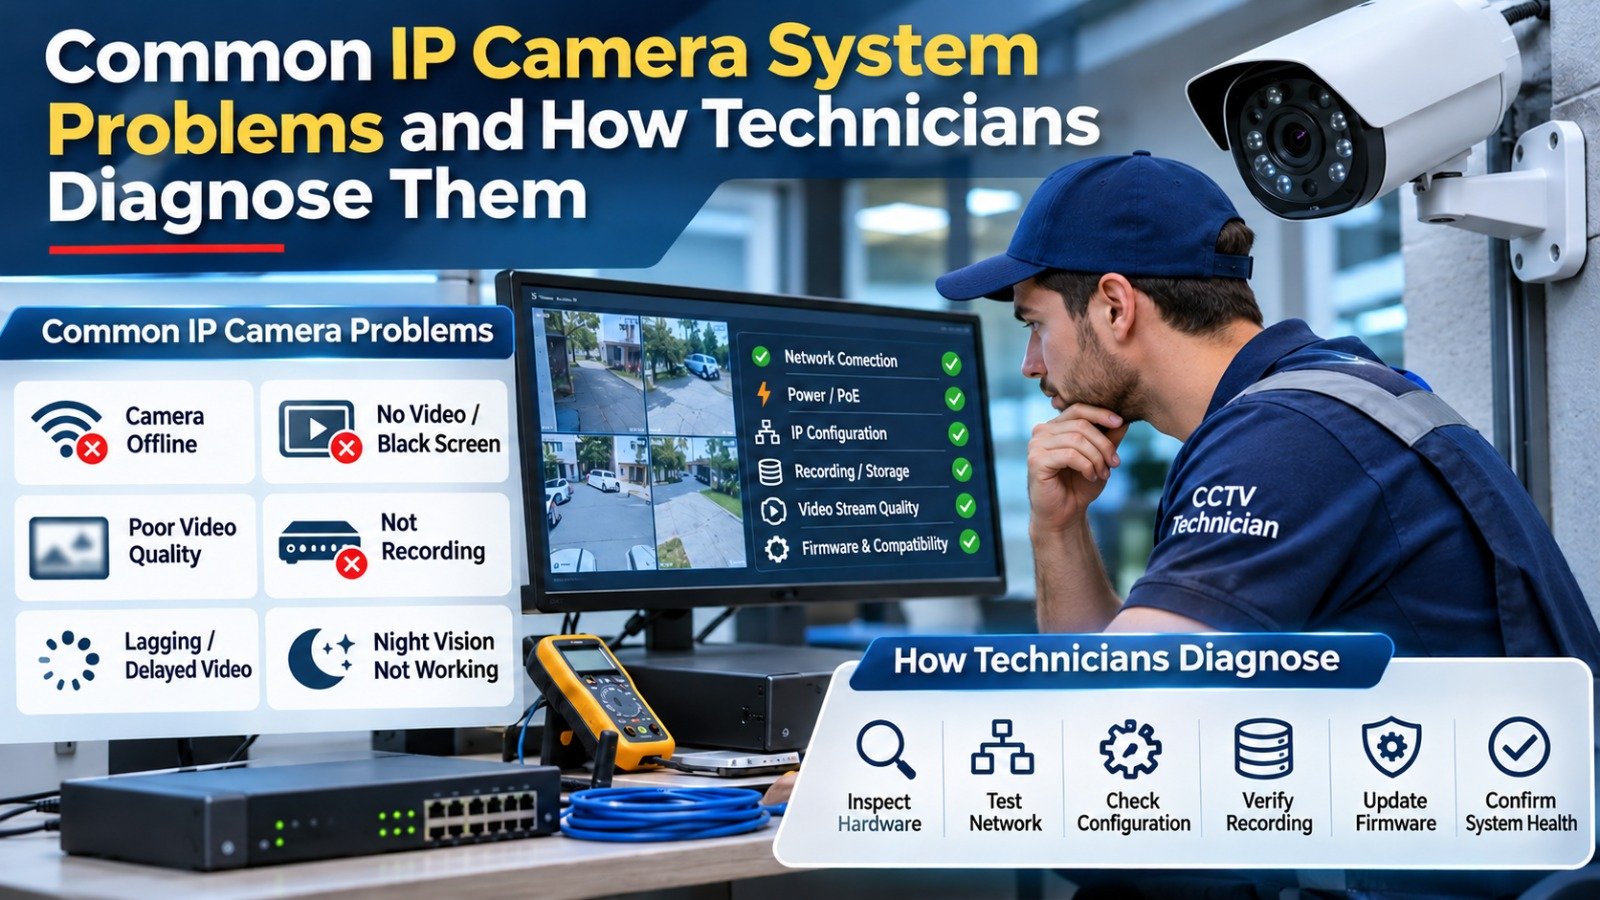
Common IP Camera System Problems and How Technicians Diagnose Them
IP camera surveillance systems play an important role in protecting commercial buildings, offices, warehouses, retail stores, residential properties, and industrial facilities. These systems allow property owners to monitor activities, record security footage, and review incidents through network-connected cameras and video management software.
However, installing security cameras does not guarantee uninterrupted operation. Network interruptions, incorrect configurations, insufficient power, storage failures, firmware issues, and environmental conditions can affect surveillance performance.
Understanding common IP camera system problems helps property owners identify warning signs before they develop into serious security issues. It also helps technicians follow a structured troubleshooting process rather than replacing equipment without identifying the actual cause.
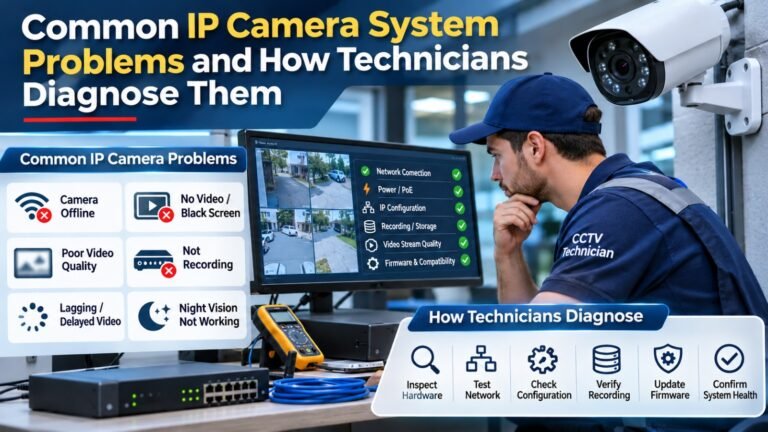
Professional technicians usually begin by examining the camera’s power supply, network connection, configuration, recording settings, and hardware condition. They then perform individual tests to isolate the faulty component.
This guide explains the most common technical issues affecting IP surveillance systems and describes how experienced technicians diagnose and resolve them.
1. IP Camera Not Connecting to the Network
One of the most frequently reported surveillance issues occurs when an IP camera stops communicating with the network.
A camera may appear offline in the Network Video Recorder (NVR), Video Management System (VMS), or mobile monitoring application. Sometimes, the camera works temporarily before losing its connection again.
Common Causes
Several factors can interrupt network communication:
- Damaged Ethernet cables or connectors.
- Incorrect IP address configuration.
- Duplicate IP addresses on the network.
- Faulty network switches.
- Incorrect subnet mask or gateway settings.
- Firewall restrictions.
- Unstable wireless connections.
- Network port configuration errors.
For example, a camera configured with an IP address outside the NVR’s network subnet may not communicate correctly with the recording device.
Similarly, two devices using the same static IP address can create an address conflict.
How Technicians Diagnose the Problem
Technicians generally follow a systematic network testing process.
Step 1: Check the physical connection
The technician examines the Ethernet cable, RJ45 connector, camera network port, and switch port. They also check the network activity indicators to identify physical connection problems.
Step 2: Verify the IP configuration
The camera’s IP address, subnet mask, default gateway, and DNS settings are checked against the network configuration.
Step 3: Perform a ping test
A technician uses the command prompt to send packets to the camera’s IP address.
For example:
ping 192.168.1.100
Successful replies indicate that the device is responding to ICMP requests. However, a successful ping alone does not confirm that video streaming or authentication is working.
Step 4: Test another network port
The technician connects the camera to another working switch port or tests it using a known-good Ethernet cable.
Step 5: Examine network traffic
For more complex cases, network diagnostic tools such as Wireshark help identify packet loss, connection resets, and communication problems.
The Axis network troubleshooting guide provides additional information about diagnosing network infrastructure and camera connectivity.
2. IP Camera Showing No Video or Black Screen
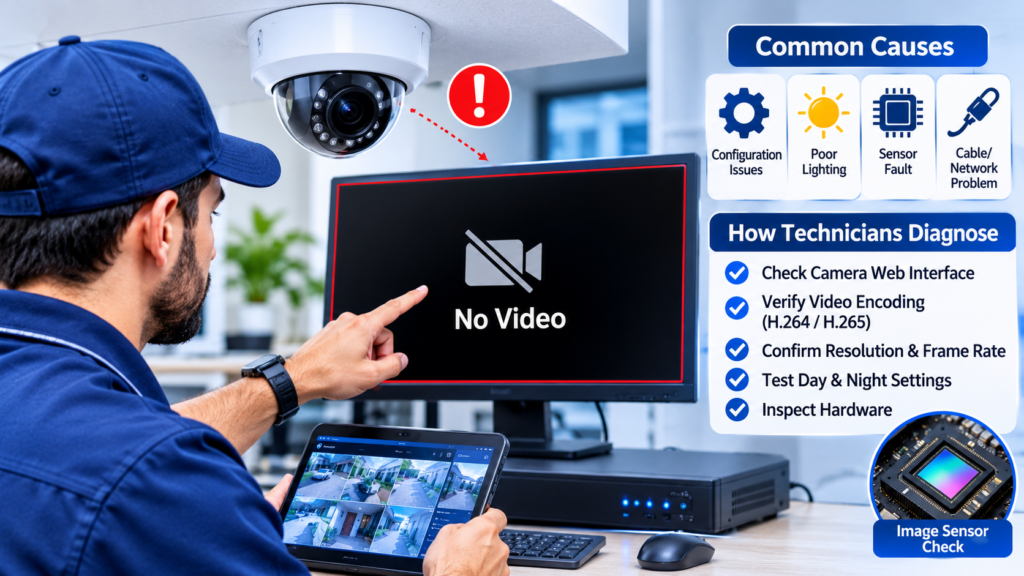
A camera can appear online while displaying a completely black screen or an unavailable video stream.
This issue is particularly problematic because the camera may appear connected to the network even though it is not providing usable surveillance footage.
Common Causes
Possible causes include:
- Incorrect video stream configuration.
- Camera sensor failure.
- Damaged image sensor components.
- Insufficient lighting.
- Incorrect exposure settings.
- Faulty infrared illumination.
- Unsupported video compression formats.
- Incorrect camera channel configuration.
- Firmware compatibility issues.
A camera installed in a poorly illuminated area may also produce a dark image if its night vision or exposure settings are incorrectly configured.
How Technicians Diagnose the Problem
Technicians begin by checking whether the camera is accessible through its individual web interface.
If the camera’s interface works but the NVR displays a black screen, the problem may involve stream configuration, decoding compatibility, or recording software.
The technician then examines the following settings:
Video encoding: Check whether the camera uses H.264, H.265, or another supported compression format.
Resolution: Confirm that the selected resolution is supported by the NVR and viewing software.
Frame rate: Verify that the camera’s frame rate is configured within the supported limits.
Day and night settings: Test infrared illumination, exposure, and low-light performance.
Image sensor: Inspect the camera for hardware damage or sensor malfunction.
If the camera produces no image through any supported viewing method, technicians may perform additional hardware tests or arrange manufacturer inspection.
3. Poor Video Quality and Blurry Camera Footage
Poor image quality reduces the effectiveness of a surveillance system.
Even when cameras remain connected and recordings are available, blurry footage may prevent security personnel from identifying faces, reading vehicle registration plates, or examining important activities.
Common Causes
Poor image quality can result from:
- Dirty camera lenses.
- Incorrect focus settings.
- Scratched protective covers.
- Incorrect resolution configuration.
- Excessive digital compression.
- Poor lighting conditions.
- Camera vibration.
- Incorrect installation angles.
- Condensation inside the camera housing.
Outdoor cameras are particularly vulnerable to dust, rainwater, humidity, and temperature fluctuations.
A camera installed near a bright light source may also experience glare or overexposure.
How Technicians Diagnose the Problem
Technicians inspect the physical camera before changing its software configuration.
They clean the lens using suitable materials and examine the protective dome or housing for scratches and condensation.
Next, they review the image configuration.
Important settings include:
- Resolution.
- Bitrate.
- Frame rate.
- Shutter speed.
- Exposure.
- White balance.
- Wide Dynamic Range (WDR).
- Noise reduction.
- Focus and zoom.
For cameras with adjustable lenses, technicians verify that the focal distance matches the surveillance area.
They may also compare live footage with recorded footage. If the live image is clear but the recording is blurred, the issue may be related to recording quality or NVR configuration.
Professional recommendation: Camera resolution should match the surveillance objective. Identifying a face or vehicle registration plate requires different positioning and image quality considerations than monitoring a general entrance area.
4. Camera Frequently Going Offline
Intermittent camera disconnections are another common issue in commercial surveillance installations.
A camera may operate normally for several hours before disappearing from the NVR. It may reconnect automatically or require manual intervention.
These interruptions can create gaps in surveillance coverage.
Common Causes
The most common causes include:
- Unstable PoE power delivery.
- Damaged network cables.
- Overloaded network switches.
- Network congestion.
- IP address conflicts.
- Faulty camera hardware.
- Excessive operating temperature.
- Unstable wireless communication.
- Incorrect switch configuration.
A particularly important factor is the available power budget of a Power over Ethernet (PoE) switch.
A switch may support multiple cameras but still fail to provide sufficient total power when all connected devices operate simultaneously.
How Technicians Diagnose the Problem
Technicians examine the camera’s connection history and compare its offline times with other network events.
They also inspect the PoE switch to determine whether its available power capacity is sufficient.
The diagnostic process generally includes:
- Checking the camera’s power consumption.
- Reviewing the switch’s PoE power budget.
- Testing the Ethernet cable.
- Checking network port errors.
- Reviewing camera logs.
- Monitoring network traffic.
- Testing the camera on another switch port.
If several cameras disconnect simultaneously, technicians investigate shared network equipment rather than assuming that multiple cameras have failed independently.
The Axis technical troubleshooting documentation explains how network infrastructure, bandwidth limitations, and device performance can affect video communication.
5. IP Camera Not Recording on the NVR
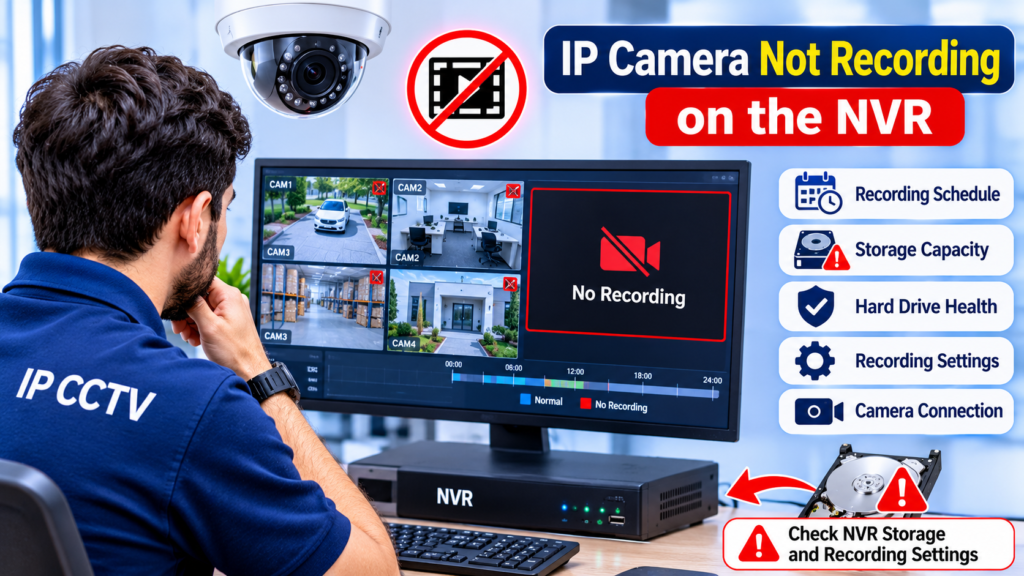
A camera may provide a live video stream while failing to save footage to the NVR.
This creates a serious security concern because property owners may discover that important recordings are unavailable when they need to investigate an incident.
Common Causes
Recording problems can occur because of:
- Incorrect recording schedules.
- Insufficient hard drive capacity.
- Failed surveillance hard drives.
- Incorrect storage configuration.
- Camera channel configuration errors.
- Recording permissions.
- Network interruptions.
- Unsupported video streams.
- Incorrect motion detection settings.
Sometimes, the NVR displays live footage but does not record because the recording schedule has been disabled.
In other situations, the recording device may have a faulty or disconnected hard drive.
How Technicians Diagnose the Problem
Technicians begin by examining the NVR’s recording status and storage information.
They check whether the hard drive is detected and whether its condition is reported as normal.
Next, they review the recording configuration.
Recording schedule: Confirm that continuous or scheduled recording is enabled for the correct days and hours.
Motion detection: Check whether event-based recording is configured correctly.
Storage capacity: Verify that sufficient disk space is available.
Hard drive health: Examine storage errors, SMART information where supported, and disk status.
Camera connection: Confirm that the NVR receives a stable video stream.
Technicians also perform playback tests using different dates and times to verify that footage is being saved correctly.
A successful live view should never be treated as proof that recording is functioning properly.
6. Slow Video Streaming, Lagging, and Delayed Footage
Video delay can affect real-time monitoring and make it difficult for security operators to respond to incidents.
Users may notice that camera footage freezes, takes several seconds to load, or displays events after they have already occurred.
Common Causes
Streaming delays may result from:
- Insufficient network bandwidth.
- High camera resolution.
- Excessive bitrate.
- Network congestion.
- Slow NVR processing.
- Poor Wi-Fi signal strength.
- High server CPU usage.
- Too many simultaneous video streams.
- Inadequate client computer specifications.
For example, a surveillance installation with multiple high-resolution cameras may require more network capacity than the existing switches and cabling infrastructure can provide.
How Technicians Diagnose the Problem
Technicians measure network performance between cameras, switches, NVRs, and monitoring workstations.
They examine:
- Network throughput.
- Packet loss.
- Latency.
- Switch port utilization.
- Camera bitrate.
- NVR CPU and memory usage.
- Client computer performance.
They may temporarily reduce the camera’s bitrate or resolution to determine whether network capacity is causing the delay.
If video performance improves after reducing the stream quality, the technician investigates bandwidth limitations and system capacity.
The Microsoft Network Camera troubleshooting documentation also discusses bandwidth limitations, camera discovery, and dropped video frames.
7. Night Vision and Infrared Problems
Night vision is essential for surveillance in parking areas, warehouses, entrances, outdoor spaces, and locations with limited lighting.
However, some IP cameras produce dark, unclear, or overexposed footage after sunset.
Common Causes
Night vision problems can develop because of:
- Failed infrared LEDs.
- Incorrect day/night switching.
- Dirty camera domes.
- Infrared reflection.
- Incorrect exposure settings.
- Insufficient infrared illumination.
- Nearby reflective surfaces.
- Incorrect camera placement.
Infrared reflection is especially common with dome cameras.
When the camera’s infrared light reflects from a nearby wall, glass surface, or dirty dome, the resulting footage may appear white or washed out.
How Technicians Diagnose the Problem
Technicians first inspect the camera’s infrared LEDs and confirm whether they activate when the lighting conditions change.
They then examine the camera’s day/night configuration.
Important settings include:
- IR illumination.
- Automatic day/night switching.
- Exposure compensation.
- Shutter speed.
- Smart IR.
- Noise reduction.
They also inspect the camera housing for dust, moisture, and reflective surfaces.
If the infrared LEDs do not operate correctly, technicians may test the camera using manufacturer-approved diagnostic procedures.
In some situations, repositioning the camera or installing suitable external infrared illumination provides a better result than replacing the entire camera.
8. Camera Not Compatible with the NVR
Compatibility problems frequently occur when surveillance systems contain cameras and recording devices from different manufacturers.
A camera may appear in the network discovery list but fail to display video or support certain functions.
Common Causes
Compatibility issues may involve:
- Unsupported ONVIF profiles.
- Incorrect authentication credentials.
- Different video compression formats.
- Unsupported resolution settings.
- Firmware differences.
- Incorrect communication ports.
- Proprietary camera features.
- Different stream configurations.
ONVIF is an important industry standard that supports interoperability between compatible network video products.
However, ONVIF support does not automatically guarantee that every feature will work across every manufacturer.
How Technicians Diagnose the Problem
Technicians begin by checking the camera and NVR compatibility documentation.
They verify whether both devices support the required ONVIF profiles and whether the camera’s firmware is compatible with the recording device.
They then examine:
- Camera IP address.
- ONVIF authentication credentials.
- Supported video profiles.
- Video codec settings.
- Communication ports.
- Firmware versions.
- Live stream availability.
If the camera works through its manufacturer application but not through the NVR, the technician investigates interoperability and stream configuration.
For additional technical information, consult the official ONVIF website and its Conformant Products database.
This helps installers verify product conformance instead of relying only on general compatibility claims.
9. Remote Viewing Not Working Outside the Local Network
Remote viewing allows property owners and security managers to monitor their cameras through mobile applications or computers from different locations.
However, a camera system may work perfectly inside the building while remaining inaccessible through an external internet connection.
Common Causes
Remote viewing problems can involve:
- Internet connectivity issues.
- Incorrect DNS configuration.
- Firewall restrictions.
- Incorrect router configuration.
- Cloud service interruptions.
- Authentication failures.
- Outdated mobile applications.
- Incorrect remote access permissions.
- ISP restrictions.
Sometimes, users can view cameras through the local Wi-Fi network but cannot access them using mobile data.
This usually indicates that the problem is related to remote connectivity rather than the camera’s local video stream.
How Technicians Diagnose the Problem
Technicians first confirm that the cameras and NVR are operating correctly on the local network.
They then check the internet connection and the remote access configuration.
The diagnostic process includes:
- Testing internet connectivity.
- Checking DNS settings.
- Reviewing firewall rules.
- Verifying cloud or P2P service status.
- Checking user permissions.
- Testing remote access through another internet connection.
- Reviewing router and device logs.
Technicians should avoid exposing camera interfaces directly to the internet without appropriate security controls.
Where supported, secure VPN access or the manufacturer’s properly configured remote access service is preferable to unnecessary open ports.
10. Camera Power Supply and PoE Failures

Power-related faults can cause cameras to shut down, restart repeatedly, or operate inconsistently.
Power over Ethernet simplifies installation by allowing network cables to carry both data and electrical power.
However, incorrect PoE configuration or insufficient power capacity can affect system reliability.
Common Causes
Typical power-related problems include:
- Faulty PoE switches.
- Damaged Ethernet cables.
- Incorrect power adapters.
- Insufficient PoE budget.
- Loose electrical connections.
- Incorrect PoE standards.
- Electrical surges.
- Excessive cable length or poor-quality cabling.
How Technicians Diagnose the Problem
Technicians inspect the power source and verify that it meets the camera manufacturer’s requirements.
They examine the PoE switch specifications and compare the available power budget with the total connected camera load.
They may also:
- Test another PoE port.
- Replace the Ethernet cable temporarily.
- Check the power supply output.
- Inspect connectors for corrosion.
- Test the camera with a compatible power source.
- Review switch power consumption reports.
If multiple cameras connected to one switch experience power interruptions, the switch’s power capacity or electrical supply should be investigated.
Replacing individual cameras without testing the shared power infrastructure can lead to unnecessary expenses.
11. Motion Detection and Security Alerts Not Working
Motion detection helps security teams identify unusual activities without continuously monitoring every camera.
However, incorrect detection settings can cause missed events, excessive notifications, or false alarms.
Common Causes
- Incorrect motion detection zones.
- Sensitivity settings that are too low.
- Excessive sensitivity.
- Poor camera positioning.
- Changing lighting conditions.
- Moving trees or vegetation.
- Shadows and reflections.
- Incorrect event notification settings.
- Unsupported smart detection features.
For example, a camera installed near a busy road may generate frequent notifications because of passing vehicles.
Similarly, a camera facing direct sunlight may detect changing shadows as motion events.
How Technicians Diagnose the Problem
Technicians examine the camera’s event configuration and test the detection area under normal operating conditions.
They review motion zones, sensitivity, object filtering, and event recording schedules.
For cameras supporting intelligent analytics, they also check whether human detection, vehicle detection, line crossing, or intrusion detection is correctly enabled.
Technicians perform controlled tests by moving through the monitored area and confirming whether the camera generates the expected event.
The objective is to configure detection according to the actual surveillance requirements rather than simply increasing sensitivity.
12. Cybersecurity and Unauthorized Camera Access
Network-connected surveillance equipment must be protected against unauthorized access.
Weak passwords, outdated firmware, exposed network services, and insecure remote access configurations can create security vulnerabilities.
These issues may compromise recorded footage, camera settings, and monitoring operations.
Common Causes
- Default administrator passwords.
- Weak user credentials.
- Outdated camera firmware.
- Unnecessary open network ports.
- Insecure remote access.
- Shared administrator accounts.
- Incorrect user permissions.
- Poor network segmentation.
How Technicians Diagnose the Problem
Technicians examine the camera’s security configuration and review available access logs.
They check for unfamiliar login activity, unexpected configuration changes, and unauthorized users.
They also verify whether the camera firmware is current and whether unnecessary services are disabled.
Recommended security measures include:
- Using strong, unique passwords.
- Updating camera and NVR firmware.
- Creating separate user accounts.
- Restricting administrator access.
- Disabling unused services.
- Securing remote connections.
- Separating surveillance equipment from general office networks where practical.
The Federal Trade Commission’s security camera guidance explains the importance of strong passwords, router security, software updates, and network protection.
The UK National Cyber Security Centre also provides practical recommendations for protecting connected security cameras.
13. How Professional Technicians Follow a Systematic Diagnostic Process
Professional troubleshooting should follow a consistent procedure.
Replacing equipment without identifying the underlying fault can increase maintenance costs and may not resolve the original issue.
When investigating IP camera system problems, experienced technicians normally work through several diagnostic stages.
Stage 1: Understand the Reported Fault
The technician asks the client when the problem started and which cameras or recording functions are affected.
They also establish whether any recent changes were made to the network, camera settings, NVR, or electrical installation.
Stage 2: Perform a Physical Inspection
The technician examines:
- Camera housings.
- Mounting brackets.
- Ethernet cables.
- Network connectors.
- PoE switches.
- Power supplies.
- NVR connections.
- Hard drive indicators.
This inspection can reveal visible damage, moisture, loose connections, and other physical faults.
Stage 3: Test Network Communication
Network connectivity is checked through IP configuration, ping tests, switch port diagnostics, and other suitable network tools.
Technicians determine whether the problem affects an individual camera or the wider network.
Stage 4: Examine Camera Configuration
The technician reviews resolution, frame rate, bitrate, encoding, time synchronization, event settings, and user permissions.
Incorrect configurations are corrected according to the camera manufacturer’s recommendations.
Stage 5: Inspect Recording and Storage
The NVR’s storage condition, recording schedules, camera channels, and playback functionality are examined.
The technician confirms that footage is actually being recorded and can be retrieved.
Stage 6: Test the Complete System
After corrective work, the technician checks live viewing, recording, playback, motion alerts, night vision, and remote access.
Where possible, the system is monitored to confirm that the original fault does not return.
Stage 7: Prepare a Maintenance Report
A professional service report should document:
- Reported issue.
- Diagnostic findings.
- Identified faulty components.
- Corrective work performed.
- Replacement parts, if required.
- Final testing results.
- Maintenance recommendations.
This documentation helps property owners maintain an accurate record of their surveillance infrastructure.
14. Preventive Maintenance to Reduce IP Camera Failures
Regular maintenance is one of the most effective ways to improve surveillance system reliability.
Instead of waiting for a camera to stop working, property owners should arrange periodic inspections.
A preventive maintenance programme should include the following activities.
Camera cleaning: Remove dust and dirt from lenses, protective domes, and housings.
Cable inspection: Examine Ethernet cables, connectors, and exposed wiring for damage.
Network testing: Review switch performance, connectivity, and network capacity.
Power inspection: Check PoE switches, adapters, and electrical connections.
Storage verification: Confirm that NVR hard drives are healthy and recordings are accessible.
Firmware review: Check manufacturer security updates and approved firmware releases.
Image quality testing: Review daytime and nighttime footage.
Remote access testing: Verify that authorized users can access the system securely.
Backup configuration: Maintain records of important network and camera settings.
The inspection frequency should depend on the installation environment, equipment specifications, and operational requirements.
Outdoor surveillance installations may need more frequent physical inspections because they face greater exposure to dust, moisture, heat, and environmental damage.
A reliable IP surveillance installation requires more than selecting high-resolution cameras and connecting them to an NVR. Network infrastructure, power delivery, storage capacity, firmware, configuration, and cybersecurity all contribute to overall system performance.
Understanding IP camera system problems allows property owners and facility managers to recognize warning signs and arrange appropriate technical inspections.
Professional technicians use structured diagnostic procedures to identify the actual source of faults. They examine physical connections, test network communication, review device configurations, inspect recording storage, and verify the complete system after repairs.
Regular preventive maintenance also reduces unexpected interruptions and helps extend equipment service life.
Whether a surveillance installation protects a small office, retail store, warehouse, commercial building, or industrial facility, professional inspection and timely maintenance are essential for dependable security monitoring.
A properly configured and maintained surveillance system provides more consistent monitoring, reliable recordings, and better protection for people and property.
Frequently Asked Questions (FAQs)
1. What are the most common IP camera system problems?
The most common issues include network disconnections, black screens, poor video quality, recording failures, delayed streaming, night vision problems, PoE power faults, and remote viewing errors. These problems can result from faulty hardware, incorrect configuration, network limitations, or insufficient maintenance.
2. Why does my IP camera keep going offline?
An IP camera may repeatedly disconnect because of unstable PoE power, damaged Ethernet cables, network congestion, incorrect IP settings, or faulty switch ports. Technicians normally inspect the power supply, test the network connection, and review device logs to identify the cause.
3. Why is my IP camera showing a black screen?
A black screen can result from incorrect video settings, insufficient lighting, faulty infrared illumination, sensor damage, or unsupported video streams. Technicians check the camera interface, image settings, and hardware condition to identify the issue.
4. Why is my IP camera not recording footage?
Recording may stop because of a faulty hard drive, incorrect recording schedules, insufficient storage, disabled motion detection, or communication problems between the camera and NVR. Checking storage health and recording configuration is an important first step.
5. How often should an IP camera system be maintained?
Maintenance frequency depends on the installation environment and operational requirements. Commercial and industrial surveillance systems should have scheduled inspections covering camera condition, network connections, power supplies, recording storage, image quality, and firmware status.
6. Can network problems affect CCTV camera performance?
Yes. Network congestion, insufficient bandwidth, damaged cables, packet loss, and incorrect IP configurations can affect video streaming, camera connectivity, and recording performance.
7. When should I contact a professional CCTV technician?
Contact a qualified CCTV technician when cameras repeatedly disconnect, recordings disappear, multiple devices stop working, image quality deteriorates, or remote access fails despite basic troubleshooting. Professional testing helps identify faults without unnecessary equipment replacement.