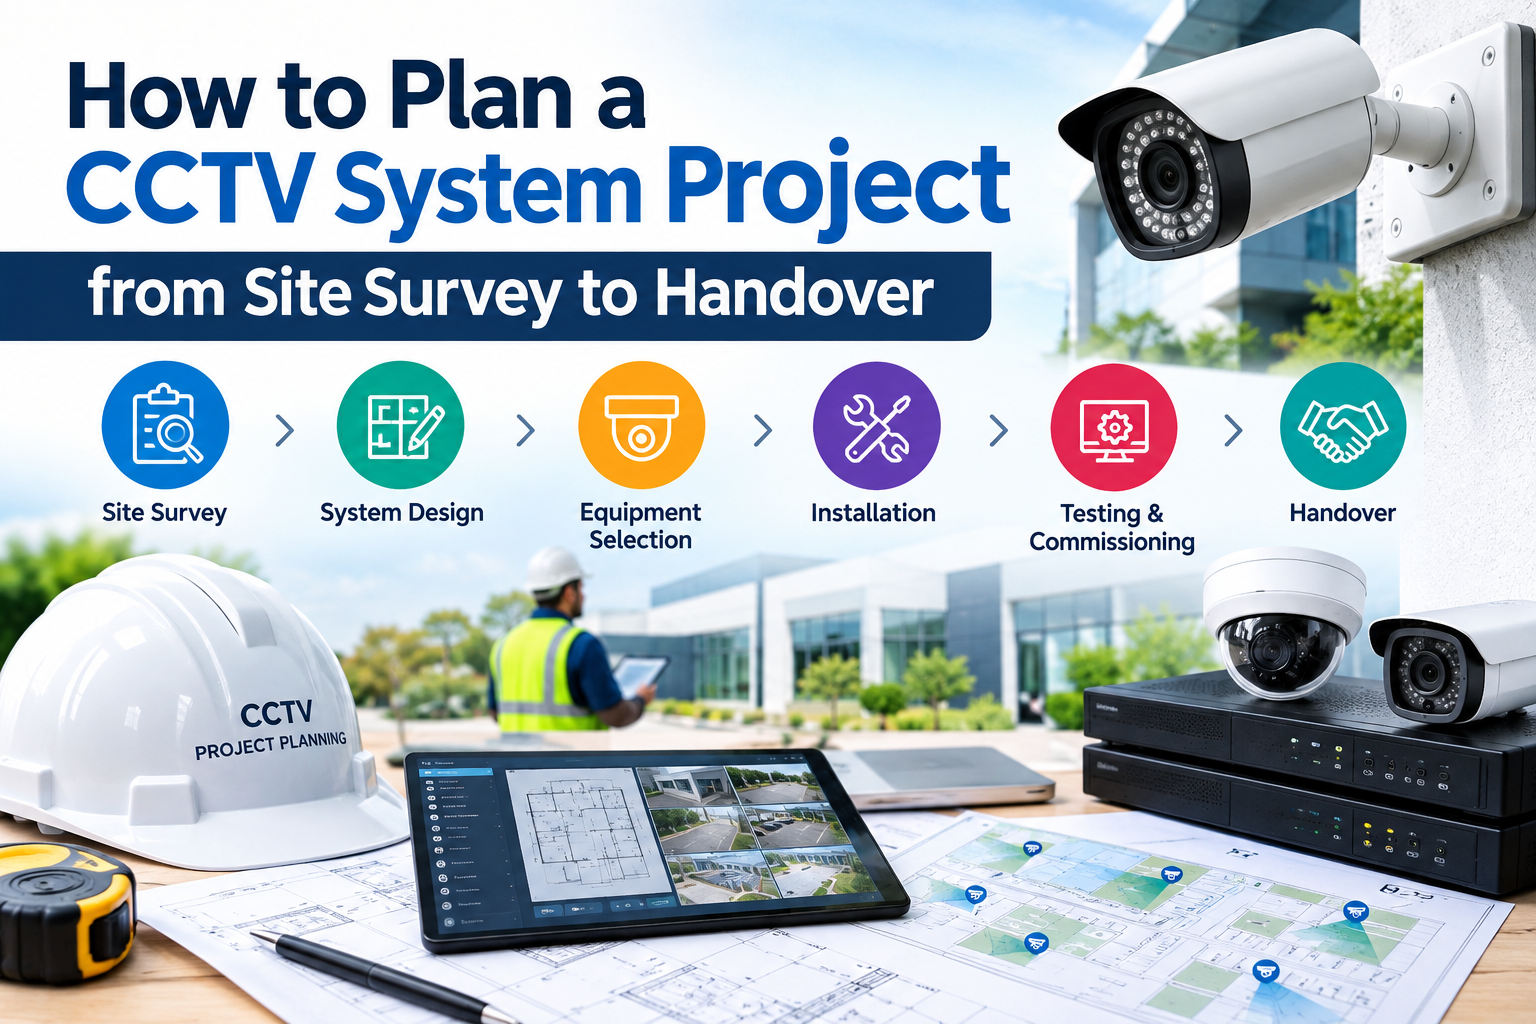
How to Plan a CCTV System Project from Site Survey to Handover
Planning a CCTV installation requires more than selecting cameras and mounting them in suitable locations. A successful surveillance project involves understanding the client’s security requirements, conducting a detailed site survey, designing the system, selecting compatible equipment, preparing the installation schedule, testing performance, and handing over a fully operational solution.
Proper CCTV system project planning helps installers reduce unexpected costs, avoid installation mistakes, improve camera coverage, and deliver a system that meets the customer’s expectations. Whether the project involves a residential property, office building, retail store, warehouse, school, hospital, or industrial facility, following a structured process makes the entire installation more efficient.
A well-planned project also considers future expansion, recording requirements, network performance, cybersecurity, maintenance, and user training. These factors help ensure that the surveillance system remains reliable after installation.
In this guide, we explain each stage of a CCTV project, from the initial site survey to final handover, so security professionals and property owners can understand what a successful installation involves.
1. Understand the Client’s Security Requirements
The first step is to understand why the customer needs a CCTV system and what problems the installation should solve.
Different properties have different surveillance requirements. A small retail shop may need cameras to monitor entrances, checkout counters, and stockrooms. A warehouse may require extensive perimeter coverage, loading-bay monitoring, and vehicle surveillance. A residential property may prioritize entrances, driveways, gardens, and other accessible areas.
Before preparing a proposal, discuss the following points with the client:
- Which areas require surveillance?
- What security risks must the system address?
- Is continuous recording required, or is event-based recording suitable?
- How many days of footage should be retained?
- Will staff monitor cameras locally or remotely?
- Are mobile notifications or intelligent detection features required?
- Who will have permission to access recordings?
- Is future system expansion likely?
These questions establish the project’s scope and help prevent misunderstandings later.
It is also important to identify the difference between monitoring an area and capturing useful evidence. A camera might show that a person entered a building, but its image quality, viewing angle, and distance from the subject may not be sufficient to identify that individual.
Document the client’s expectations in writing before moving forward.
2. Conduct a Detailed Site Survey
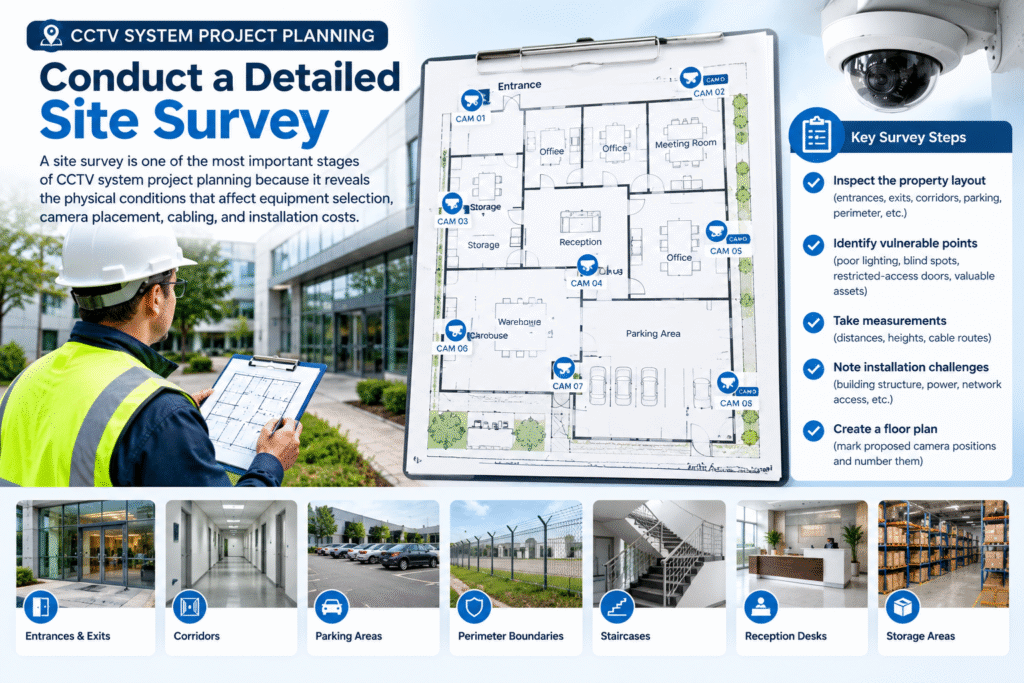
A site survey is one of the most important stages of CCTV system project planning because it reveals the physical conditions that will affect equipment selection, camera placement, cabling, and installation costs.
The survey should involve visiting the property, inspecting the relevant areas, taking measurements, and identifying potential installation challenges.
Inspect the Property Layout
Start by reviewing the building layout, entrances, exits, corridors, parking areas, perimeter boundaries, staircases, reception desks, storage areas, and other important locations.
Identify vulnerable points, including poorly lit passages, restricted-access doors, blind spots, and areas where valuable equipment or stock is stored.
Where possible, obtain a floor plan or create a basic drawing showing the proposed camera positions. Number each camera location so that it can be referenced consistently in the design, installation schedule, and final handover documents.
Assess Lighting Conditions
Lighting can significantly affect surveillance footage. Inspect the property during daylight and, where possible, after dark.
Look for direct sunlight, strong backlighting, reflective surfaces, shadows, and areas with insufficient illumination.
For outdoor installations, consider headlights, streetlights, changing daylight conditions, and weather-related visibility problems. Cameras with suitable wide dynamic range or low-light capabilities may be necessary in challenging environments.
Identify Physical Installation Challenges
Check ceiling heights, wall materials, available mounting surfaces, cable routes, equipment-room access, and the distance between cameras and recording equipment.
Also identify areas that may require ladders, lifting equipment, specialist access arrangements, or additional installation time.
Record the location of existing power outlets, network cabinets, switches, and available communication infrastructure.
Evaluate Privacy and Safety
Ensure proposed camera positions respect applicable privacy laws and workplace policies. Avoid unnecessary monitoring of private spaces, and determine whether audio recording or remote access introduces additional legal obligations.
Check whether drilling, working at height, or accessing restricted areas requires permits or coordination with the building manager.
A thorough survey produces the information needed for an accurate design and realistic quotation.
3. Prepare a Camera Placement Plan
Once the site survey is complete, develop a camera layout that provides the required coverage without unnecessary duplication.
The goal is not simply to install as many cameras as possible. Each camera should serve a defined purpose.
Identify Critical Coverage Areas
Common locations include:
- Main entrances and emergency exits
- Reception desks and customer service areas
- Cash registers and payment counters
- Warehouse aisles and loading bays
- Parking lots and vehicle entrances
- Building perimeters and boundary gates
- Server rooms and restricted-access locations
Assign a unique camera identification number to every position, such as CAM-01, CAM-02, and CAM-03.
Select Appropriate Camera Types
Different camera designs suit different environments.
Dome cameras: Often suitable for offices, retail stores, corridors, and indoor commercial spaces.
Bullet cameras: Commonly used for outdoor monitoring and visible perimeter surveillance.
PTZ cameras: Allow operators to pan, tilt, and zoom, making them useful where active monitoring and adjustable viewing are required.
Turret cameras: Often provide flexible mounting options for indoor and outdoor installations.
Specialized cameras: Thermal, panoramic, or advanced low-light models may be appropriate for specific operational requirements.
Camera selection should depend on the scene, viewing distance, lighting, environmental conditions, and required level of detail.
Consider Viewing Angles and Blind Spots
Avoid placing cameras where walls, columns, signs, plants, or equipment obstruct the view.
Entrances may benefit from cameras positioned to capture faces clearly, while parking areas may require wider coverage and cameras dedicated to vehicle identification.
Do not assume that a wide-angle camera will provide sufficient detail across an entire large area. If the client needs to identify faces or read vehicle registration plates, calculate whether the selected camera and lens can provide adequate detail at the intended distance.
The completed layout should include camera numbers, mounting positions, viewing directions, and the purpose of each camera.
4. Select the Right CCTV Equipment
Equipment selection should follow the approved design rather than being based solely on price or advertised resolution.
A reliable project uses compatible components that meet the site’s technical and operational requirements.
Cameras and Lenses
Consider resolution, frame rate, sensor performance, lens options, infrared illumination, weather protection, and intelligent detection capabilities.
For outdoor cameras, check the environmental protection rating and the manufacturer’s specified operating temperature.
For locations where clear identification is important, assess the actual field of view and image detail instead of relying on resolution alone.
Recording Equipment
Choose an appropriate network video recorder (NVR), digital video recorder (DVR), or video management system (VMS).
The recording solution should support the required number of cameras, their resolutions, recording settings, playback requirements, and planned future expansion.
Confirm that the selected equipment supports the intended camera models and required features.
Network Switches and Power Supplies
IP cameras may use Power over Ethernet (PoE), allowing compatible network switches to provide both connectivity and power through Ethernet cabling.
Check the switch’s total PoE power budget, individual port capacity, network bandwidth, and available ports. A switch with enough ports may still be unsuitable if its power budget cannot support all connected cameras.
Analog systems may require separate power supplies and compatible coaxial cabling.
Compatibility and Standards
When combining devices from different manufacturers, verify that the required functions actually work together.
Review the official ONVIF Profiles and Specifications to understand how standardized interfaces support interoperability between compatible IP security products.
Do not assume that every advertised feature is available across different brands merely because a device claims ONVIF support. Verify the relevant product’s conformance and the specific functions required by the project.
5. Calculate Storage and Network Requirements
Recording capacity and network performance must be considered before purchasing equipment.
Insufficient storage can cause footage to be overwritten sooner than expected, while inadequate network capacity can produce delayed video, dropped frames, or unstable camera connections.
Estimate Storage Capacity
Storage requirements depend on the number of cameras, resolution, frame rate, compression method, average bitrate, recording schedule, and retention period.
A simplified planning formula is:
Storage in GB = Total bitrate in Mbps × 10.8 × recording days
This estimates decimal gigabytes for continuous recording, assuming the bitrate remains constant.
For example, eight cameras averaging 4 Mbps each would generate approximately 345.6 GB of video data per day. For 30 days, the estimated requirement would be 10,368 GB, or approximately 10.4 TB, before allowing for practical overhead and storage configuration.
Actual requirements may differ because camera bitrates vary with scene activity, compression, and recording settings. Storage calculations should therefore include an appropriate allowance and be checked against the recorder manufacturer’s recommendations.
Calculate Network Bandwidth
Add the expected camera bitrates to estimate the total video traffic. Then consider recording traffic, live viewing, remote connections, analytics, and other network services.
Verify that switches, uplinks, network cabling, and the recorder can handle the expected load.
For more technical guidance, consult the AXIS Technical Guide to Network Video.
6. Prepare the Project Budget and Scope
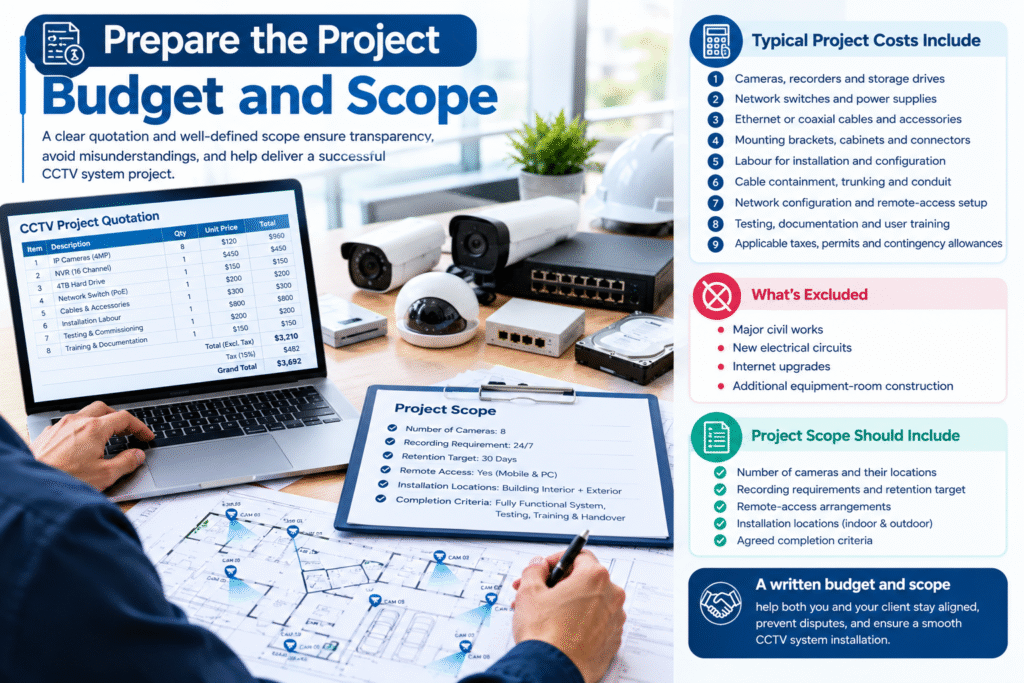
After confirming the design and equipment requirements, prepare a detailed quotation.
A clear quotation should separate the major cost categories so the client understands what is included.
Typical project costs include:
- Cameras, recorders, and storage drives
- Network switches and power supplies
- Ethernet or coaxial cables and accessories
- Mounting brackets, cabinets, and connectors
- Labour for installation and configuration
- Cable containment, trunking, and conduit
- Network configuration and remote-access setup
- Testing, documentation, and user training
- Applicable taxes, permits, and agreed contingency allowances
Specify the quantity, model, and key specifications of major equipment.
Also define what is excluded, such as major civil works, new electrical circuits, internet upgrades, or additional equipment-room construction.
The scope should describe the number of cameras, recording requirements, retention target, remote-access arrangements, installation locations, and agreed completion criteria.
A written scope helps prevent disputes when expectations change during installation.
7. Create a Project Schedule and Installation Plan
A realistic project schedule coordinates equipment procurement, site access, installation, configuration, testing, and handover.
Break the work into manageable stages, with a responsible person assigned to each activity.
For example, a project may follow this sequence:
- Requirements confirmation and site survey
- Design approval and quotation acceptance
- Equipment ordering and delivery
- Cable routing and infrastructure preparation
- Camera and recorder installation
- Network configuration and system setup
- Testing, defect correction, and commissioning
- Customer training and final handover
The duration depends on project size, site conditions, working hours, and access restrictions. A small residential installation may be completed relatively quickly, while a multi-building commercial project may require phased deployment.
Confirm whether work must take place outside business hours and coordinate with other contractors where necessary.
Include time for equipment delays, unexpected cable routes, failed components, and customer-requested adjustments.
Good project management means planning for testing and handover from the beginning, rather than treating them as last-minute tasks.
8. Install Cabling and Infrastructure Correctly
Before mounting cameras, prepare the infrastructure required to connect and power the system.
Follow the approved cable routes and label cables at both ends. Use suitable cable types, connectors, and containment methods for the installation environment.
For outdoor runs, use cabling and protective materials rated for the relevant environmental conditions. Provide suitable protection against moisture, physical damage, and electrical interference.
Avoid routing data cables too close to sources of electrical interference unless the installation method and applicable standards permit it.
Observe manufacturer-specified Ethernet channel lengths, bend radii, and installation practices. Use appropriate surge protection and grounding arrangements where required by the design and local regulations.
For larger installations, use a rack or cabinet that provides suitable ventilation, secure equipment mounting, cable management, and room for maintenance.
Test cable runs before connecting all equipment. For Ethernet installations, suitable cable certification or testing tools can help identify wiring faults, excessive losses, and other issues before commissioning.
9. Mount Cameras and Configure the System
Once the infrastructure is ready, install cameras at the approved locations.
Mount each camera securely and ensure the position provides the intended field of view. Adjust the angle to minimize obstructions, glare, and unnecessary views of private areas.
After mounting, configure the camera and recording equipment.
Configure Camera Settings
Set the appropriate resolution, frame rate, compression, image orientation, exposure, and day/night behaviour.
Configure motion detection, line-crossing rules, intrusion zones, or other analytics only where the equipment supports them and the feature meets the project’s requirements.
Test intelligent detection under realistic conditions. Moving trees, changing lighting, reflections, and passing traffic can trigger unwanted alerts if detection zones are poorly configured.
Configure Recording
Set recording schedules according to the agreed requirements. Confirm whether cameras should record continuously, on motion, or using a combination of recording modes.
Configure date, time, and time zone correctly. Network Time Protocol (NTP) can help synchronize timestamps across compatible devices.
Confirm that the recorder can play back footage from every camera and that the retention configuration matches the approved design.
Secure Network and Remote Access
Change default passwords and create individual user accounts with appropriate permissions.
Use strong, unique credentials, update firmware according to a controlled process, and disable unnecessary services. Avoid exposing cameras or recorders directly to the public internet without an appropriate security design.
Where remote viewing is required, use a secure, supported connection method and verify that authorized users can access the system without granting unnecessary privileges.
These configuration tasks are essential parts of professional CCTV system project planning because they affect reliability, usability, and security after the installation team leaves the site.
10. Test and Commission the CCTV System
Commissioning verifies that the installed system meets the agreed requirements.
A camera showing a live image is not sufficient evidence that the complete installation is working correctly.
Prepare a commissioning checklist and test each camera, recorder, network connection, and required feature.
Camera Coverage and Image Quality
Inspect every camera during daylight and nighttime conditions where relevant.
Check for poor focus, excessive glare, overexposure, underexposure, reflections, blocked views, and unsuitable viewing angles.
Confirm that the image provides the level of detail required for its intended purpose.
Recording and Playback
Verify that all cameras record according to the agreed schedule.
Play back recorded footage from different times and confirm that timestamps are correct. Check whether the required footage can be searched, exported, and reviewed.
Where retention requirements are important, verify the storage configuration and confirm that the available capacity supports the intended retention period.
Network and Power
Check camera connectivity, switch status, PoE power availability, and recorder performance.
Review any disconnection alerts or device errors. Confirm that the system recovers appropriately after a controlled restart when restart testing is required.
Remote Viewing and Alerts
If remote access is included, test it using the customer’s authorized device or account.
Confirm that notifications, motion alerts, and other specified functions operate as expected.
Document any defects, assign responsibility for correction, and repeat the relevant tests after repairs.
For additional guidance on system verification and integration workflows, review the AXIS Camera Station Integrator Guide.
11. Complete Documentation and Customer Handover
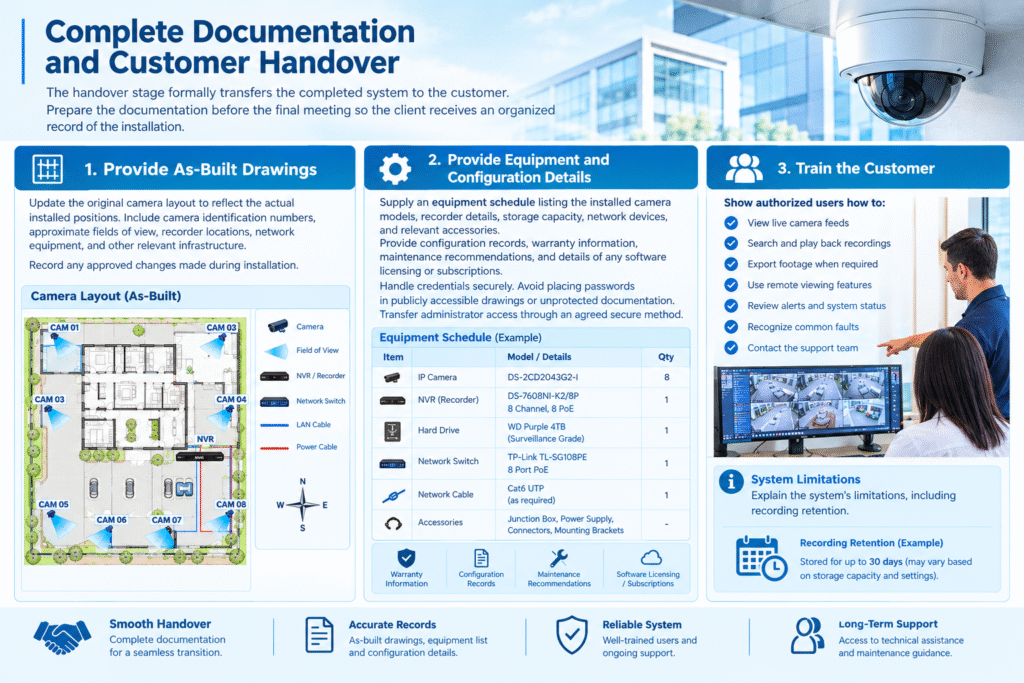
The handover stage formally transfers the completed system to the customer.
Prepare the documentation before the final meeting so the client receives an organized record of the installation.
Provide As-Built Drawings
Update the original camera layout to reflect the actual installed positions.
Include camera identification numbers, approximate fields of view, recorder locations, network equipment, and other relevant infrastructure.
Record any approved changes made during installation.
Provide Equipment and Configuration Details
Supply an equipment schedule listing the installed camera models, recorder details, storage capacity, network devices, and relevant accessories.
Provide appropriate configuration records, warranty information, maintenance recommendations, and details of any software licensing or subscriptions.
Handle credentials securely. Avoid placing passwords in publicly accessible drawings or unprotected documentation. Transfer administrator access through an agreed secure method.
Train the Customer
Show authorized users how to:
- View live camera feeds
- Search and play back recordings
- Export footage when required
- Use remote viewing features
- Review alerts and system status
- Recognize common faults
- Contact the support team
Explain the system’s limitations, including recording retention, camera coverage, remote-access dependencies, and any features not included in the agreed scope.
Obtain Formal Acceptance
Walk through the completed installation with the customer and demonstrate the agreed functions.
Record outstanding issues, if any, with an agreed correction plan. Obtain written acceptance once the required completion criteria have been met.
A documented handover reduces confusion and establishes a clear starting point for maintenance and support.
12. Establish a Maintenance and Support Plan
A CCTV installation requires ongoing attention to maintain reliable performance.
During handover, explain the recommended maintenance schedule and clarify who is responsible for monitoring system health.
Routine maintenance may include cleaning camera lenses, checking mounts, reviewing recording status, inspecting cable connections, testing remote access, and checking storage health.
Firmware updates should be managed carefully, with compatibility checks and appropriate backups or recovery arrangements where supported.
Review user accounts periodically and remove access for individuals who no longer require it.
For important sites, consider scheduled inspections, health alerts, documented service visits, and a process for responding to camera or recording failures.
The support agreement should define response times, warranty responsibilities, exclusions, and the process for requesting additional work.
Regular maintenance helps identify developing faults before they cause prolonged recording gaps or loss of important footage.
13. Common Mistakes to Avoid During CCTV Project Planning
Even technically capable installers can encounter problems when planning is incomplete.
Skipping the site survey: This can lead to unsuitable camera positions, underestimated cable lengths, and unexpected installation costs.
Choosing cameras based only on resolution: High resolution does not automatically guarantee clear identification. Lens selection, lighting, distance, and camera placement also matter.
Underestimating storage: Incorrect retention calculations can cause important footage to be overwritten earlier than expected.
Ignoring network capacity: Poorly planned bandwidth and PoE capacity can lead to unstable connections and degraded performance.
Overlooking cybersecurity: Default passwords, unnecessary internet exposure, and poorly managed user accounts create avoidable risks.
Failing to test nighttime performance: A camera that looks good during the day may deliver disappointing footage after dark.
Skipping documentation: Missing camera labels, configuration records, and updated drawings make future maintenance more difficult.
Rushing the handover: Customers need clear instructions and access to the documentation required to operate the system confidently.
Avoiding these mistakes requires a structured workflow, clear communication, and documented acceptance criteria at every important stage.
14. Final Checklist: From Survey to Handover
Use the following checklist to track progress throughout the project.
Before installation
- Confirm the client’s security objectives.
- Complete and document the site survey.
- Approve the camera layout and system design.
- Calculate storage, bandwidth, and power requirements.
- Confirm the budget, equipment list, and project scope.
- Arrange site access and the installation schedule.
During installation
- Install and label cables correctly.
- Mount cameras according to the approved design.
- Configure cameras, recording, and network settings.
- Apply appropriate cybersecurity controls.
- Record any approved design changes.
Before handover
- Test camera views during relevant lighting conditions.
- Verify recording, playback, and retention settings.
- Check remote viewing and required alerts.
- Correct outstanding faults and repeat failed tests.
- Provide as-built drawings and equipment records.
- Train authorized users and transfer access securely.
- Obtain customer acceptance and agree on maintenance arrangements.
Conclusion
A successful surveillance installation depends on careful preparation, technical design, quality installation, thorough testing, and clear communication with the customer.
Following a structured CCTV system project planning process helps installers identify risks early, select compatible equipment, manage budgets, and deliver a system that meets its intended security objectives.
The most important principle is to treat the project as a complete service rather than simply a camera installation. The site survey defines the requirements, the design guides the work, commissioning verifies performance, and handover ensures that the customer can use and maintain the system effectively.
By following these steps, security integrators can improve project consistency, reduce avoidable rework, and build stronger long-term relationships with their customers.